HELLDIVERS™ 2

HELLDIVERS™ 2

1,587 ratings
Helldiver's Bestiary: Deliver Democracy Effectively
By Hijinks
With no Beastiary in the game to properly tell you the best way to dispatch your enemies, I thought it pertinent to tell you the best way to take democracy's enemies out.

Cause sometimes, its not always about the head.

This guide will be updated as new info and enemies are added!
117
62
78
5
17
13
10
13
3
7
3
5
5
4
3
   
Award
Favorite
Favorited
Unfavorite
Terminids (The Bugs)
Terminids that are weak to light armor penetrating weapons:
Scavenger


Warrior


Bile Warrior


Hunter


Pouncer


Bile Spitter


Brood Commander


Alpha Commander


Alpha Warrior


In Depth:
  • Scavenger: Tiny, weak, but great in numbers, they are feeble and pathetic but can kill you if you let them or if they gang up. No real strategy, shoot them, grenade them, stratagem them, they all die in 1-2 shots or 1-2 melee. Be aware they can call reinforcements at any time; by the time you notice, it will typically be too late and you'll have a bug breach.
  • Warrior: The rank and file of the Terminids, they also appear abundantly and as such are also relatively weak. Once again, no real strategy; shoot them, grenade them, melee them, stratagem them, they die all the same. Be aware that if you blow their head off, they can still track and attack you for a final time! Double tap or melee them to be sure! Be aware they can call reinforcements at any time; by the time you notice, it will typically be too late and you'll have a bug breach.
  • Bile Warrior: The acidic brother of the Warrior bug. Same traits as the Warrior but it's attacks cause poison damage and when killed will explode in an acidic puddle, damaging you over time. Same strategy as above, but take care not to melee them or blow them away too close to you as their acid attack will slow you and damage you over time. Be aware they can call reinforcements at any time; by the time you notice, it will typically be too late and you'll have a bug breach.
  • Hunter: Stark white and spring stepped, these are essentially giant mosquitos that will chase you to the end of the earth to stab you. They will dodge your attacks, flank, jump at you, and are prone to waiting for more of their brothers to show up so they can gang up and attack you to death. Best strategy is to be litigious and take these guys out ASAP because if you leave them alone they will track you until either you or they are dead. Be aware they can call reinforcements at any time; by the time you notice, it will typically be too late and you'll have a bug breach.
  • Pouncer: the agile cousin of the Scavenger. Essentially a Scavenger that can jump at you, same rules as the Scavengers apply; shoot them, melee them, grenade or stratagem them. Same rule also applies for them as the Hunters though; they will track you down until either you or they are dead, so kill them on sight. Be aware they can call reinforcements at any time; by the time you notice, it will typically be too late and you'll have a bug breach.
  • Bile Spitter: Basically a Scavenger bug that can spit acid. They will stay out of melee range to pelt you with acid spit that will slow you and eat at your flesh over time, giving time for you to get attacked from all side by the rest of their brethren. Not a huge priority if you can stay away and strafe from their attacks, but take care not to pop them too close as their explode in an acid puddle that will do the same as their spit attacks!
  • Brood Commander: Basically the officers for the bugs, they are massive dark blood red bugs that have hearty defenses and can summon other bugs without even needing to call for reinforcements like a standard bug breach. Same rules as the warrior bugs apply though; headshots will put it down quickly but they will attempt a final swan song attack before finally stumbling over dead. Destroying their limbs will also slow them down considerably but just blow off their heads and strafe away. Be aware they can call reinforcements at any time; by the time you notice, it will typically be too late and you'll have a bug breach.
  • Alpha Commander: The Brood Commander, but bigger, stronger and quicker to call in backup. Will take MUCH more of a beating before it goes down, as such it is heavily advised to use support weapons to take them down. On higher difficulties, completely replaces the Brood Commanders.
  • Alpha Warriors: Warrior bugs but red and faster than their lowlier ilk. Summoned by the Alpha Commander, and considering the spawn rate of them, they will almost certainly end up being half of the warrior bugs you end up fighting. Same breakpoints as the warrior bug but start off much faster.
Terminids (The Bugs, Cont.)
Terminids that are weak to medium armor penetrating weapons:
Hive Guard


In Depth:
These bugs guard the hives (glowing red bug holes, egg hatcheries, and bug POI's) and as such have much heavier armor than the rest of their kin. After taking repeated fire they will hunker down and use their head and front limb's heavy armor to tank attacks. They CAN be killed with light armor penetrating weapons (shotguns will always have some pellets hit their softer underbelly) but if you hate these guys with a passion you can always use a support weapon like the railgun to one shot them to the head or use guns like the AR-23P, JAR-5 Dominator, Slug Shotgun, Counter Sniper Diligence, etc. Be aware they can also call reinforcements!

Special Cases
Stalker

The Stalker bug is essentially a larger Hunter bug, BUT the trick is that it uses camouflage to mask itself until its right up close to 3 hit combo you. It can be killed using any weapon, but it takes a lot of punishment and when its at half/low on health it'll jump backwards to retreat, likely reengaging optical camouflage. Press the attack and kill it before it disengages! These bugs will ONLY appear if there is a Stalker Hive on the map; as such they will likely attack from the same direction their hive is located; kill them and then search around for their hive to make sure more don't appear!

Shrieker


The Shrieker is a new mutation of the bug that appeared as we activated the TCS towers. These are flying variations of the bugs that'll swoop down and attack any helldiver brave enough to venture towards their nests. Follow their flying behavior and find their nests, destroy them using hellbombs, and you should have stopped their spawns for this mission.

UPDATE: SHRIEKERS CAN NOW APPEAR ON EVERY MISSION REGARDLESS OF THEIR NEST'S PRESENCE, YOU CAN BE 100% SURE THEY'LL APPEAR IF YOU SEE THE SHRIEKER PRESENCE EFFECT ON MISSION.

In terms of dealing with the Shrieker specifically, putting lead into them like all the other bugs works well. Just be sure to protect your head!

Nursing and Bile Spewers


Bugs that have MASSIVE sacks on their behinds. Will spew bile at you to either one shot you or slow you down with damage over time, letting weaker bugs get in and finish the job.
  • Nursing Spewer: Yellow sacks on their back, video game logic dictates this must be their weakspot, right? WRONG. Shoot the head to take them down quickly as their behinds are incredibly tanky and will only go down quickly if you use an explosive on them. The Grenade Launcher support weapon makes quick work of them; 2 shots to a group of them and it will almost always take the entirety of them down.
  • Bile Spewer: Green sacks on their back, these also spawn a lot and are essentially a more deadly version of the Nursing Spewers. They will either hang back and launch bile mortars to blot the skin with acid, which if they don't one shot you, will ragdoll you making it easier for small bugs to get you, or they'll get close and use their acid spew attack to kill you. Their heads and spine are armored and will shrug off light armor penetrating weapons, so if you have a medium armor pen weapon the same rule as the nursing spewer applies where you can headshot them to take them down fast. If you don't, you can shoot the glowing sacks with any weapon for less but more consistent damage, just be sure to stand back as they will explode into an acid puddle, damaging and slowing you!

Terminids (The Bugs, p3)
Charger & Charger Behemoth


This is the bug that is giving all of Super Earth Armed Forces trouble. Heavy armor on pretty much all parts of its body, with only its backside exposed, its a tough beast. Heavy AT Weapons such as the Recoilless rifle will 1-2 shot at almost every angle, with a headshot almost always delivering a single killing blow. Railgun once again can reliably kill either to the head, or the old trick of stripping the leg armor and then shooting it down with a primary weapon. Flamethrower can once again kill reliably, just be sure to target the leg for the fastest TTK. Anti Material rifle as well as the Autocannon can also kill these bugs, but they take considerably more munitions to kill from the front/side and therefore its recommended to target their squishy butt when using these weapons against it.

Same rules apply for the Charger Behemoth, which has appeared more widely on Terminid missions following Viper Commandos Warbond; They have slightly more health than their little brothers but still die the same to the above mentioned support weapons.

Spore Charger

The Spore Charger is the newest abomination of the Charger line of bugs, and they are annoying. Pseudo stealthy, it uses a cloud of spore fog to mask its approach until the last second, they also use it to hide their allies movements to better attack you.

Same rules as above once again apply: hit its head with AT stratagems or blow it up using a call-in explosive.

Impaler


After 100 years, the dreaded Impaler returns, seemingly larger and more imposing! They tend to stick to the outside of battles in order to burrow their stabby tentacles under the surface to 'impale' you and ragdoll you. The trick is to either run away from the tentacles, or if that isnt an option, dive and crawl away.

Fortunately, they're pretty straight forward to take out; while it's tentacles are impaled under the surface, they leave their squishy head weak spot exposed, letting you kill them with 1-2 rockets or your preferred AT stratagem weapon or call in.
Terminids (The Bugs, p4)
Bile Titan

The Bile Titan has been nerfed, and therefore almost every support weapon is now viable in killing it. Shooting its exposed underside is a good option as it'll both do decent chunks of damage to it, but also stop it from doing its bile spit attack. Rockets to the head from a Recoilless, EAT, Quasar cannon, etc will all one shot kill it. 2-3 rockets from the Commando or Mech will kill it to the head. Dumping rounds from the autocannon, anti material rifle, heavy mg, grenade launcher to its squishy underside also works. Targeting it tail section is the best method as this has the lowest breakpoint to kill it, as well as a very noticeable death explosion when the tail section is destroyed/


Below are the best stratagems for taking these guys out, I usually take 1-2 of them on higher difficulty bug missions:
  • Railgun: With the changes to the railguns penetration, the gun now needs to be in UNSAFE mode to achieve penetration, as such you need to charge over the safety marker and fire for it to even penetrate. However, this is still a viable weapon, just not the end all be all.
  • Recoilless Rifle: This is now the most straightforward option as if you aim and hit the head, it will 9.9/10 kill the bile titan in one shot.
  • EAT: Only having 2 per calldown is a bit of a problem but since the cooldown is only 70 seconds you can litter the field with these so you have more than enough to take down anything that comes at you. Same as above in terms of effectiveness, just no reload (which is either good or bad depending on whether you down it or not).
  • Orbital Laser: will swipe over the entire designated area, so try to aim this right in front or right underneath the titan if you want it to target it the full blast. Very good when combined with railgun shots or other ordinance on it.
  • Orbital Railcannon Strike: A Single railcannon round targeted at the largest enemy in the area (IE: Bile Titan). It won't one shot it on higher difficulties unless it hits the head, but will wipe out a sizeable chunk of its health.
  • Eagle 500KG Bomb: A LOT of people seem to use this like a get out of jail free card, but its not. You have to land this almost directly onto the enemy for it to do its max damage output, outside of that it will fall off massively. If you do manage to land the bomb directly onto the enemy, it'll embed and explode shortly after, instant killing it most certainly. Probably the most skillful and efficient option.
  • Autocannon Sentry: extremely useful in general in higher difficulty bug missions due to the abundance of armored bugs, but you need to place it in a secluded spot and keep it protected for it to do its job. It will NOT kill the Bile Titan on its own, you will need to support it, but it's useful nonetheless.
  • Rocket Sentry: probably the better sentry option since it targets larger enemies first. Just like the Autocannon sentry, if you support it and keep it safe, it will put in work.
Terminids (The Bugs, p5)
The Predator Strain

A Gloom enhanced strain of Terminids that display different tendencies than their normal brethren while also sporting enhanced abilities. Can be differentiated by their striking black and yellow stripe pattern.

Predator Hunter


A hunter that has been enhanced by the Gloom, they are much more aggressive and are capable of cloaking like normal Stalkers. They also jump and attack faster, making it extremely difficult to get away unless you use the jump pack or FRV.
  • Cloaking: they have developed the same cloaking ability as their normal Stalker brethren, using this to get closer before an opening attack
  • Bile Vomit: They are also capable of spitting bile over a short range, allowing them to attack from a slightly longer range their their normal version, while also slowing those not quickly killed by them.

Fire damage is extremely effective against them as 1 tick of fire damage will limit their ability to cloak, as well as the fact they have effectively the same breakpoints as normal hunters, allowing only 1-2 fire blasts to soften them up before they keel over from afterburn.

Predator Stalker


A Stalker that has been enhanced by the Gloom, they have foregone their capability to cloak, instead now having a MUCH higher spawning change, no longer having to have a Stalker Lair to spawn from. They are extremely aggressive, no longer fleeing upon taking enough damage, instead fighting to the death. Can be spotted by their black yellow and red pattern.
  • Spawn Rate: They are essentially Stalkers that are no longer burdened by the game's Stalker Lair POI in order to spawn, and as such seem to have no cap on how many can spawn, as well as have no territorial nature to them.
  • Pack Nature: They spawn in greater numbers and in groups, and patrol in numbers to hunt for prey, as seen by the Charger corpses littered around the map.
  • Relentless: They WILL NOT stop until either their target (YOU) or they die. As such there is no real way to escape them; they will travel almost the entire map to kill you once locked on. Your only choice is to kill them to the last or die trying.

They have the same breakpoints as normal Stalkers, and will take damage from everything. Weapons with high stagger and stun capabiltiies, like the Halt, Pummeler as well as the Punisher are effective at keeping them at a distance. Of course, a multiple headshots in quick succession with most any weapon will kill one, but there are of course the many they travel with. Tesla towers, high rate of fire turrets, as well as minefields can be used to delay and/or kill them, as well as using support weapons with high rates of fire in order to keep pressure on them as they dart towards you.
Terminids (The Bugs, p6)
Spore Burst
A variation of the Terminids that have been altered by long term exposure to the Gloom, they appear to be almost "infected," with red and white carapaces similar to flesh and bone. They are in essence the same as their normal counterparts except for one key point: exploding after death into spores and gas.
  • Spore Death Explosion: All Spore Burst variants will explode into spores and gas upon death, not only obscuring your vision, but slightly damaging and more importantly, slowing the Helldiver, leaving you vulnerable to further attacks. You are advised to slay them from slightly further away in order to avoid this.

Spore Burst Scavenger


A Scavenger that has been "enhanced" by prolonged exposure to the Gloom, they are essentially the same as their non-gloom counterparts except for one key difference: exploding into spores and gas upon death.
  • Swarm Spawn: They also can now spawn in swarms. Combine this with their death explosion, and you can take out the entire swarm if they are close enough.

Spore Burst Hunter


A hunter that has been "enhanced" by prolonged exposure to the Gloom, they are essentially the same as their as their non-gloom counterparts except for one key difference: exploding into spores and gas upon death.

Spore Burst Warrior


A warrior that has been "enhanced" by prolonged exposure to the Gloom, they are essentially the same as their as their non-gloom counterparts except for one key difference: exploding into spores and gas upon death.
Automatons (The Bots)
Automatons that are weak to light armor penetrating weapons:
Trooper/Raider/Marauder
Commissar

In Depth:
When in doubt, just remember that if its around the same height as a human, it can be killed effectively with a headshot from any of your weapons. 1-2 shots to the head will put these bots out of action quickly, but if in a pinch you can put 4-5 into center mass to put them down no fuss as well. These bots are equipped with machine guns, rocket launchers, pistols and knives and just straight up dual blades. All are extremely easy to take down, but they don't come alone typically leading you to having to engage multiple at once. Be aware that ALL these bots can call in reinforcements using a flare gun, initiating a bot drop.
  • Trooper/Raider: Basic gun, not a threat until they're bunched up. They are also the units you see on the scout strider, will jump off and attack normally if their strider is destroyed but they survive.
  • MG Raider: Raider with a machine gun and backpack, actually dangerous since they can burst you down quite easily.
  • Rocket Raider: These guys used to be able to consistently one shot you, but now that the rockets are mostly concussive, theyre not a big deal. The issue is the ragdolling; getting hit by one will knock you down, giving the enemy ample time to gun you down.
  • Assault Raider: Bot infantry equipped with a jump pack, blade and pistol, will try to get right in your face to either kill you quick OR martyrdom you since they explode on death. Hit them out of the sky, hit them before they even fly off, or run!
  • Brawler: dual blades, will seek you out in melee. Can attempt to block melee and even bullets aimed at its chest at close range.
  • Marauder: Bot equipped with rapid fire cannon and slightly tougher armor, can be singled out by their maroon head and larger shoulders.
  • Commissar: Noticeable for using a handgun and a knife, they can call in dropships to bring reinforcements. Kill them first!

Automatons that are weak to medium armor penetrating weapons:
Berserker
Devastator

In Depth:
Standing head and shoulders above the rest of the bots, are the Berserkers and Devastators. The Berserker is armed with dual chainsaws and will chase you down to rip you to shreds, while the Devastators can be armed with miniguns, rocket pods, their fists, and even a massive shield. You can take these guys out with almost a full mag of any weapon to the head, but if you want to truly have a good chance against these guys, bring a medium armor penetrating weapon like the JAR-5 Dominator or AR-23P. You can of course always use a railgun, autocannon, or rocket against them to finish them off in 1-2 shots.
  • Berserker: Dual chainsaws for arms, taking the arms out means it can't as easily kill you. Unfortunately, these guys often spawn in groups, so don't bother unless you're low on health and you only have 1 to kill. Aim for the glowing red midsection; this is their weakspot and thus will be the fastest way to kill it.
  • Devastator: Arm mounted rifle, higher priority over the small bots but if you see their big brothers ignore them and focus on them first. Headshots from any gun will kill fast, their heads will catch on fire and then fall over dead. Center mass also works, try to aim for the connector between its torso and legs as this will bisect it resulting in a faster kill. Will attempt to punch you if you get too close.
  • Rocket Devastator: The MUCH more dangerous older brother. Will stand at range and when they spot you, will get into a firing stance before UNLOADING 4-8 rocket salvos. Run if they're already firing at you, they might miss and if you're lucky they'll only do splash damage. Engage from cover, using your normal guns and engage the head or if not possible, center mass. Center mass also works, try to aim for the connector between its torso and legs as this will bisect it resulting in a faster kill. I treat these guys as a the TOP priority of all the Devastators and as such I usually use my third gun/heavy to kill them. Horribly ammo efficient but effective. You CAN destroy their rocket pods, leading them to try to use their arm mounted rifle or try to punch you to death.
  • Heavy/Shield Devastator. Noticeable due to the big shield they carry, as well as the mini-gun. These are the automatons shock troopers, and as such have heavier armor. Use armor piercing, flank them, aim for the head, or use a heavy weapon. Center mass also works, try to aim for the connector between its torso and legs as this will bisect it resulting in a faster kill. Once again, the PLAS-Scorcher can hit their shield and the resulting plasma explosion will damage the Shield Devastator BEHIND it, very useful for Bot missions!
Automatons (The Bots, Cont.)
Special Cases

Scout Strider


While it can be killed easily by headshotting the operator from the back or the side, using a railgun, autocannon or rocket will put these out of commission rather easily. Shooting at the crotch with any weapon will also put it out of commission if you dont have a support weapon or armor piercing primary. If up close, it will attempt to kick or stomp you, so don't get too close. The PLAS-Scorcher can also hit the front of them and deal splash damage that'll put BOTH out of commission, very useful on Bot missions!

Rocket Scout Strider


The Bots have been busy reinforcing all the weakspots on the Scout Striders, as well as upping their firepower. The operator is now protected 360 degrees from light pen weapons, and now sports 4 dumb fire rockets alongside its typical heavy laser. Getting hit by their rocket's is almost a guaranteed death, but due to their size they are slow, so don't get too close to them and take them out from a distance!

The same rules as above apply for the normal Scout Strider as these except that you can't flank them; medium pen weapons to the crotch/joints will take out the vehicle, as well as autocannon, rockets, PLAS-Scorcher, etc. The weak spot however are those 4 dumbfire rockets on each side, shooting it will detonate all of them, instant killing it.

Hulk

The bruiser, obliterator, and scorcher hulks are all heavily armored from almost every angle; the key to killing these behemoth bots is to flank it and hit the glowing red heatsink on its back. Any weapon can harm them if this is hit, but to quickly put them down, use a rocket, railgun, autocannon, etc. If that is not an option, a railgun shot directly to the head will instantly kill it, or you can aim center mass with those same options until it goes down, or to slowly make it combat ineffective, shoot off its limbs, it even has an achievement!
  • Hulk Bruiser:Dual Rocket Launchers. Will Spam at range, simplest solution is to aim for the eye with a heavy piercing weapon such as the autocannon, antimaterial rifle, or blow it up with an AT weapon. If that isn't possible, the large red heat sink can be damaged with any weapon to put it out of commission.
  • Hulk Obliterator: Dual Laser Cannons capable of suppressing fire at range or shredding capability up close. Same as above; hit the eye, flank or stay away.
  • Hulk Scorcher: Armed with a large flamethrower (longer range than ours, and deceptively long too) and an auto-axe melee, they will try to get close and burn you with their flamethrowers and if closer, end you with melee. Same as before, headshot with AT, flank and hit the weakspot, or take off their arms.

Annihilator Tank


The traditional cannon tank, the Annihilator, has a massive heatsink on the back of the turret, making for an easy way to put these armored vehicles down. Luckily, the rotation speed of the tank is slow, making this easy if the tank is without infantry support. If that isnt any option, laying into it with grenades, stratagem strikes, railgun, autocannon, or rockets will do the trick.

Shredder Tank


The Shredder Anti-Air tank however (noticeable from its quad mount flak guns) is a tougher beast: the same rules apply of hammering it with heavy weapons and stratagems until its dead, but getting close enough to hit its weakspot may be a problem due to its much higher turret rotational speed. If you do manage to get behind it, hit its weakspots to put it down quick!

Barrager Tank


The Barrager Rocket Artillery tank is a long ranged siege tank that will pummel you from a distance with its Sherman Calliope-style mounted rocket turret. At close range however, is its weakness, as it typically will not dumb fire up close, letting you flank and take out its cooling exhaust on the back of the body. At any other angle, rockets as well as call in stratagem strikes will take them out.

Dropship


You've likely noticed these when the Bots patrols call in reinforcements. They appear to be nigh unkillable, but did you know if you hit any of the 4 engines on it with a rocket, it'll lose control and crash? Even better; hit ANYWHERE with a recoilless rifle shot and itll break in half and explode! Great way to stop enemy reinforcements and give yourself some breathing room! If not, unload AOE weapons (autocannon, grenade launcher) in the drop bay, taking out the reinforcements, or grenade or call in a stratagem in the dropping spot, quickly dispatching them ala Halo CE Speedruns.

Automatons (The Bots, P3)
Gunship


The Bot's have upped their war effort and are fielding autonomous gunships in their operations, that will seek and destroy any helldiver's on mission. They are armed with rapid fire machine guns and rocket pods, as well as a detector beam that will seek you out before gunning you down. Search for the large "helipad" gunship factory and call in a hellbomb to destroy it for good.

UPDATE: AS OF THE VIPER COMMANDO'S WARBOND, GUNSHIPS CAN APPEAR ON ALL AUTOMATON MISSIONS, YOU CAN BE 100% SURE THEY WILL SPAWN IF YOU SEE THE GUNSHIP PRESENCE EFFECT ON MISSION. PLAN AND EQUIP YOUR LOADOUT ACCORDINGLY!

As for the gunships themselves, their red exhausts are their weak points, hitting them with any support weapon (the laser cannon, heavy MG and good old autocannon works wonders) will put them out of commission quickly. Just be careful to avoid their crash!

Factory Strider


Super Earth intelligence has spotted a massive, 4 legged walking fortress of an automaton weapon that is armed to the teeth, armored from nearly every angle, can produce Devastators, and capable of shrugging off ordnance easily. Avoid the front/head as this is where a machine gun nest is located that will QUICKLY gun you down! A massive tank cannon is also located on its back that will turn to fire, watch for its charge and move to cover when it glows red hot!

  • Head: Heavy Armor, must be hit with AT weapons such as recoilless rockets. 1-2 will suffice.
  • Back/Radiators: can be destroyed with 2 rockets to expose a medium armor area, where autocannons and impact grenades can take it out. Hard to see from below so find a height advantage to do so!
  • Abdomen/Underside: will produce Devastators periodically as a protection escort. When this occurs, the underside will open unveiling an easy way to kill it.
  • Cannon Turret: Heavy Armor, can be destroyed with 1-2 rockets, massively weakening its firepower.
  • Chin Lasers: medium armor, a few autocannon shots can put it out of action making frontal attacks easier.
  • Legs: Heavy Armor, two parts on each leg can be destroyed, once both parts are destroyed the Factory Strider will take a huge hit to its mobility.

As for stratagems to use, consider 500kg bombs, 110mm rocket strafes, Railcannon Strikes, and Orbital Lasers to take them out of action.

Cannon Turret


Litter the map as POI's as well as armed defensive structures on the sides of bases and objective areas, these are essentially the turret from the Annihilator tank but mounted to a tower. Can snipe you from long distance if youre detected, if you notice one sneak up and destroy it before it has the chance. Shooting the weakpoint from the back is preferable, but if not unload AT weapons into any area until it explodes.

Mortar Turret


You will get an audible alert from Mission Command along the lines of "WARNING: YOU ARE IN RANGE OF ARTILLERY" That means you are sighted in and being tracked by a Bot base mortar emplacement. Usually 2-3 will be in the base and as such you can expect 2-3 mortar rounds roughly on your position with stunning accuracy. Figure out where the mortars are arcing from, move in that direction (DO NOT STAND STILL) and take the base. The mortars have red heat sinks on the back that are their weakness, but they can take damage from any support weapon or armor piercing stratagem call in.

Anti-Air Emplacement


You will likely see tracer's lighting up the sky, and as you get close notice your Eagle based stratagems being jammed. Follow the source of the tracer fire in the sky and you'll find 2-3 AA emplacements. Same rule as the other turrets applies; hit the red heat sink weakspot on the back until its destroyed.

Heavy Laser Turret


EXTREME PRIORITY. You will most if not always find these in Automaton fortresses, typically 4-6 per. They have the capability of 2 shotting you; first shot will knock you and the second will finish you off, even in heavy armor. You are best off engaging these at a distance with heavy AT weapons like the recoilless or quasar cannon, as well as disposable AT like the EAT or Commando; as stratagems can and will miss against them due to their tiny size. If you do get up close, an impact grenade or thermite will kill them in 1-2 nades.
Automatons (The Bots, Pt. 4)
The Jet Brigade


A new sub faction of the Automaton's, they are chrome-colored bots that have stolen and reverse engineered the Helldiver's jump packs, allowing them to equip almost all of their standard units with crude replication's of them. As such, they replace all but the Rocket Troopers on the mission with Jet Brigade variants, who utilize their new found mobility to jump on you or flank. They are also slightly hardier, having 25% more health than the their main fleet counterparts. Fortunately, their badly adapted tech has a fatal flaw: any shot, from any weapon, to their jump packs will explode them, instantly killing the bot, as well as lighting the surrounding area on fire.
  • Jet Brigade Commissar: A regular Bot Commissar with a jump pack. His first instinct when the fighting starts is to summon a dropship, which will of course bring multiple bot drops. Eliminate first.
  • Jet Brigade MG Raider: A regular MG Raider bot but with a jump pack. Will ruthlessly jump towards your position, and upon landing spray your immediate area with laser fire. Deadly up close, but not the worst thing to come at you.
  • Jet Brigade Assault:Assault raiders from the main force but slightly hardier. Same as the main force; jump pack, blade and pistol. While fire the pistol at range, launch at you, and then try to slice you. Shoot them out of the sky or run away; just don't be caught close to them when they explode.
The Illuminate (The Squids)
Illuminate weak to light penetration weapons:
The Voteless

Watcher


In Depth:
  • The Voteless are nothing more than previously democratic citizens, harvested and turned into mindless zombies to be thrown at us. They are individually weak, and as such can be killed extremely easily with a single shot to the head, or multiple to the body, and in the case of the new melee weapons, a few quick strikes.

    They are however dangerous in crowds, where they can amass to 30-40 strong, where at that point it is recommended to bring chaff clear weapons like the machine guns, airburst rocket launcher, or flack autocannon.

  • Watcher: The Watcher is an evolved version of the Illuminate's previous scout unit of the past, the Observor. Whereas previously they had no weaponry to speak of, they know have electric shock attack capability to discourage you from getting close. It appears to be the only Illuminate unit capable of calling in reinforcements, and as such it is recommended to take these out post-hast before they can launch flares.

Illuminate weak to medium pen weapons:
Overseer

Elevated Overseer


In Depth:
  • Overseer: The Illuminate return, showing their horrid face for the first time in a century. Noticeably using the Voteless as chaff this time around, it is expected that the Illuminate have been extremely culled to the point they must use other beings as frontline fighters. Nevertheless, those that remain have become hardier and more resilient beings, capable of surviving nearly a full mag of Liberator rounds. Carrying a dual purpose staff that switches between ranged fire and upclose, they are dual purpose unit that prefers to hang back and let the Voteless sweep you like a wave. However, once in range, their white armor can be stripped to reveal their more fragile flesh, leaving them exposed rather quickly. Light pen weapons, while usable, are not nearly as effective as Medium pen weapons when it comes to taking these squad leaders down, as such I highly recommend using medium pen or higher weapons on them. One tap headshot with the heavy pen weapons, aim for the head when using them!

  • Elevated Overseers: Squ'ith units capable of extended flight, they prefer to skirmish in the air and pepper you with their plasma rifles rather than fighting on the ground. While not nearly as hardy as their ground counterparts, their ability to fly and slip around easily makes them slightly more efficiently resilient than their grounded brothers. However, if the jetpacks are destroyed, you ground and kill the unit, exploding them and those in close proximity. Light pen weapons, while usable, are not nearly as effective as Medium pen weapons when it comes to taking these squad leaders down, as such I highly recommend using medium pen or higher weapons on them. One tap headshot with the heavy pen weapons, aim for the head when using them!
The Illuminate (The Squids, Cont.)
Special Cases

Harvester


In Depth:
  • Harvester: The Illuminate's current heavy frontline units, they are massive 3 legged walkers that fulfill the Illuminate's abduction role. They have somewhat heavy armor compared to the rest of their brethren, shrugging off light pen weaponry, but being able to be harmed by medium pen and above. However, that is only possible when its bubble shield is not up, which it will deploy as soon as it is engaged in combat. When that happens, arc and energy based-weapons become extremely useless against them, leading to ballistic and stratagems being the best way to strip the bubble shield off. When that occurs, using armor penetrating weapons like the machine gun, heavy machine gun, rocket launcher, and autocannon, are all viable ways of taking them down. While it may seem like their blue eye is their weakspot, its only their weakest armored area, target their joints near the center top to quickly kill them.

Illuminate Warpships


In Depth:
  • Warpship: The standard dropship for the Illuminate's, this is their preferred way to drop off reinforcements when called in. When that happen's, they will fly in a predictable pattern before leveling off to allow their middle section to beam in reinforcements. This is the crucial part: the middle circle is the weakpoint, and upon hitting that with rocket launchers, will take 1-2 shots depending on rocket type. Taking down the warpships will significantly reduce the amount of reinforcements called in.

Illuminate Tesla Tower


In Depth:
  • Just like our own, these are towers that utilize electricity arcs to "discourage" enemy combatants from getting close. These are typically found in heavy Illuminate encampments, protecting the entry of their landed warpships. Just like our own, they will not fire upon prone units, making it easier to evade them. Using this knowledge, chuck a grenade, use explosive weaponry like the crossbow or rocket launcher, or use a stratagem call in to destroy them.
Afterword & Thanks
First, allow me to thank Arrowhead for this amazing game, as well as Sony for publishing it.

THANKS TO THE HELLDIVERS COMMUNITY FOR MAKING THIS THE FIRST 5 STAR REVIEWED GUIDE FOR THE GAME, OVER 50K UNIQUE VIEWS, 1.3k FAVORITES AND MAKING THIS THE NUMBER 1 RATED GUIDE FOR THIS GAME ON STEAM.

Please also check out my other guide thats focused on the Boosters in the game as well!

125 Comments
Hijinks  [author] Mar 1 @ 2:52pm 
Added new photos for previous units that are more inline with the rest of the guide (when available)
Hijinks  [author] Feb 15 @ 4:02pm 
Predator Strain terminids (the predator hunter and stalker) added as well as their abilities and how to fight them
Zen Feb 4 @ 9:25pm 
Great guide. Thanks.
UnknownChallenger Feb 4 @ 7:49pm 
NOT THE STRIDER FROM HALF LIFE AGAIN!!!
Thedeadmemelord Jan 7 @ 12:13pm 
The flamethrower is a great way to deal with the illuminate, it can hit large herds of voteless for tons of damage if you keep your distance and it can deal massive damage to the harvesters since it ignores most armour.
TruMediaMix1 Jan 3 @ 6:32am 
@MoneyGunsWife For me, the button to "throw it back" is "F" :griefer:

I admittedly grew to use that button as my default "interact button" for most games thanks to Cyberpunk 2077, IIRC, but it's been too long to fully recall nevertheless.
MoneyGunsWife Jan 2 @ 4:04am 
Small difference about the pouncer and hunter bugs jumping:

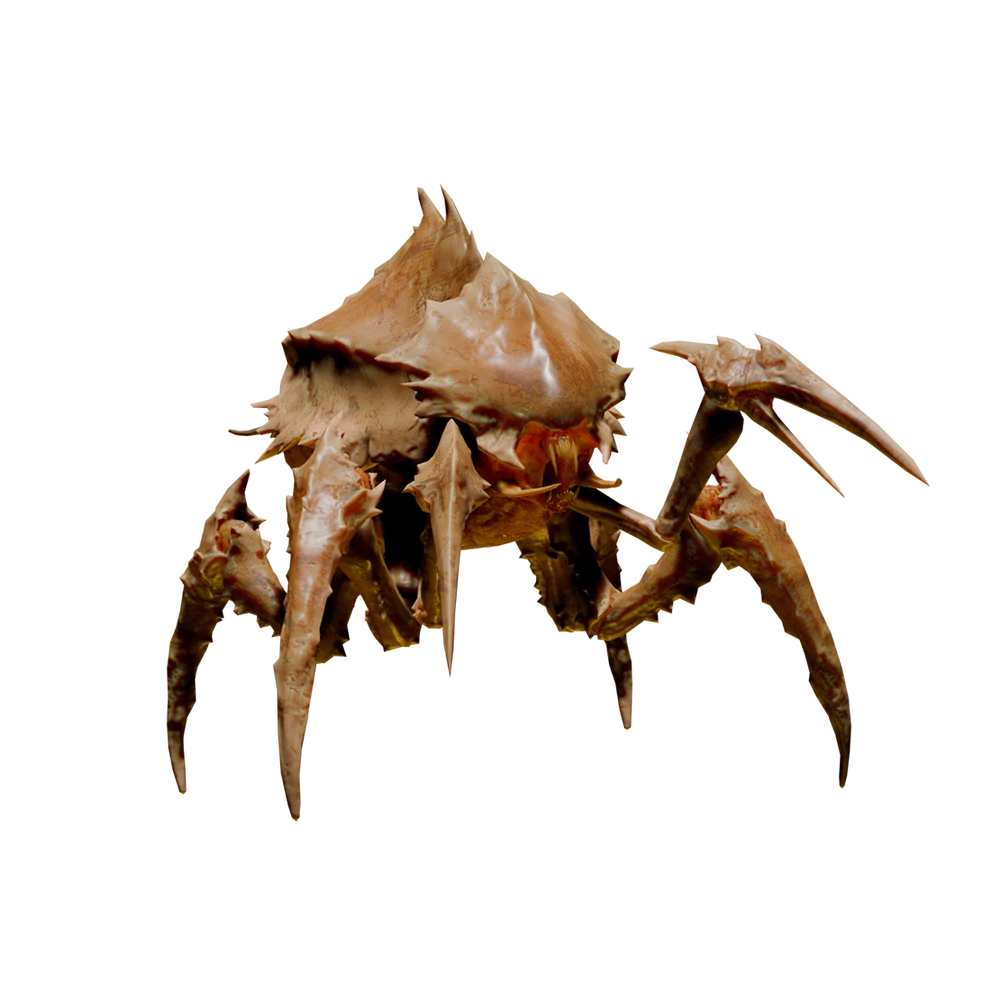
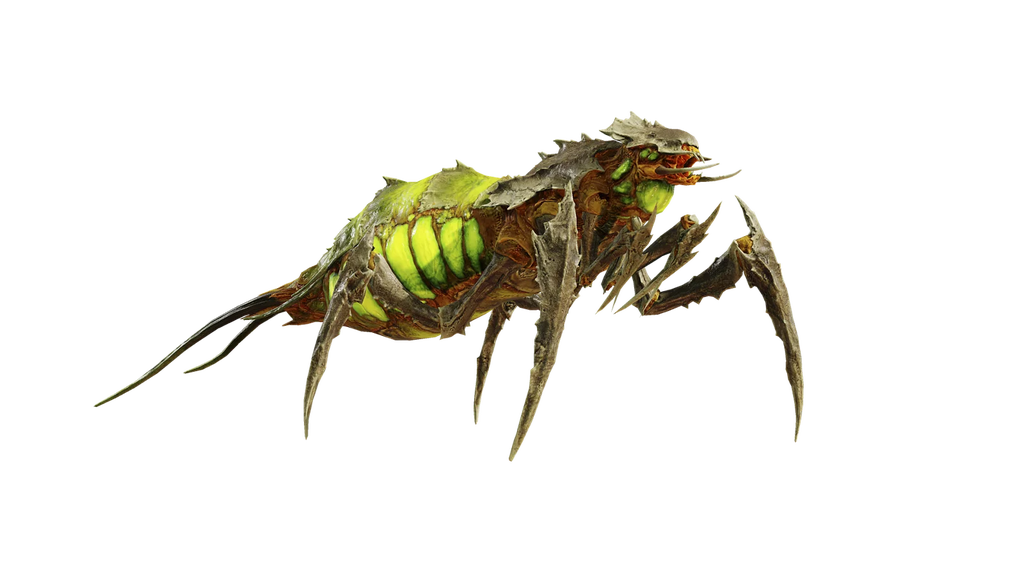
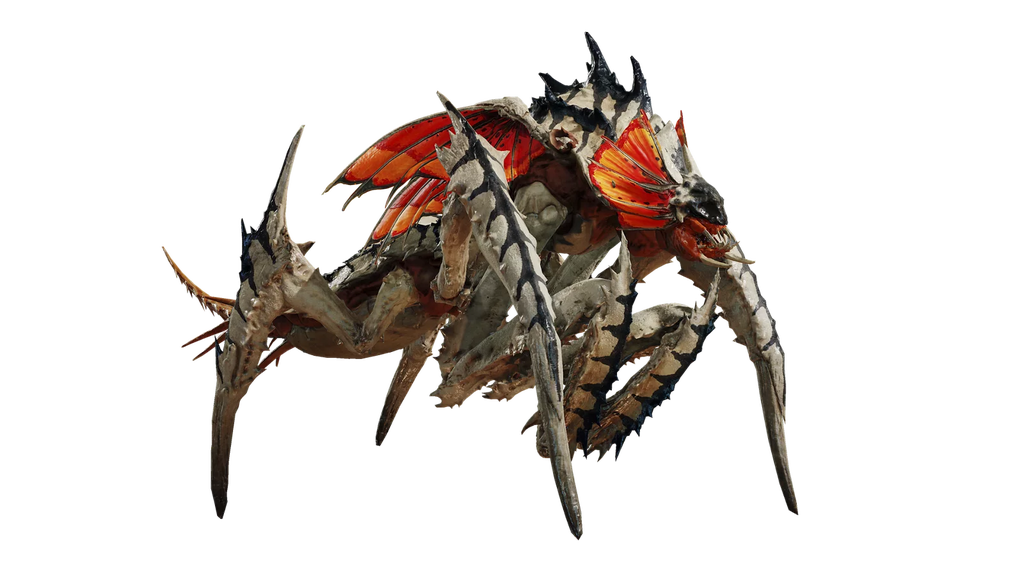
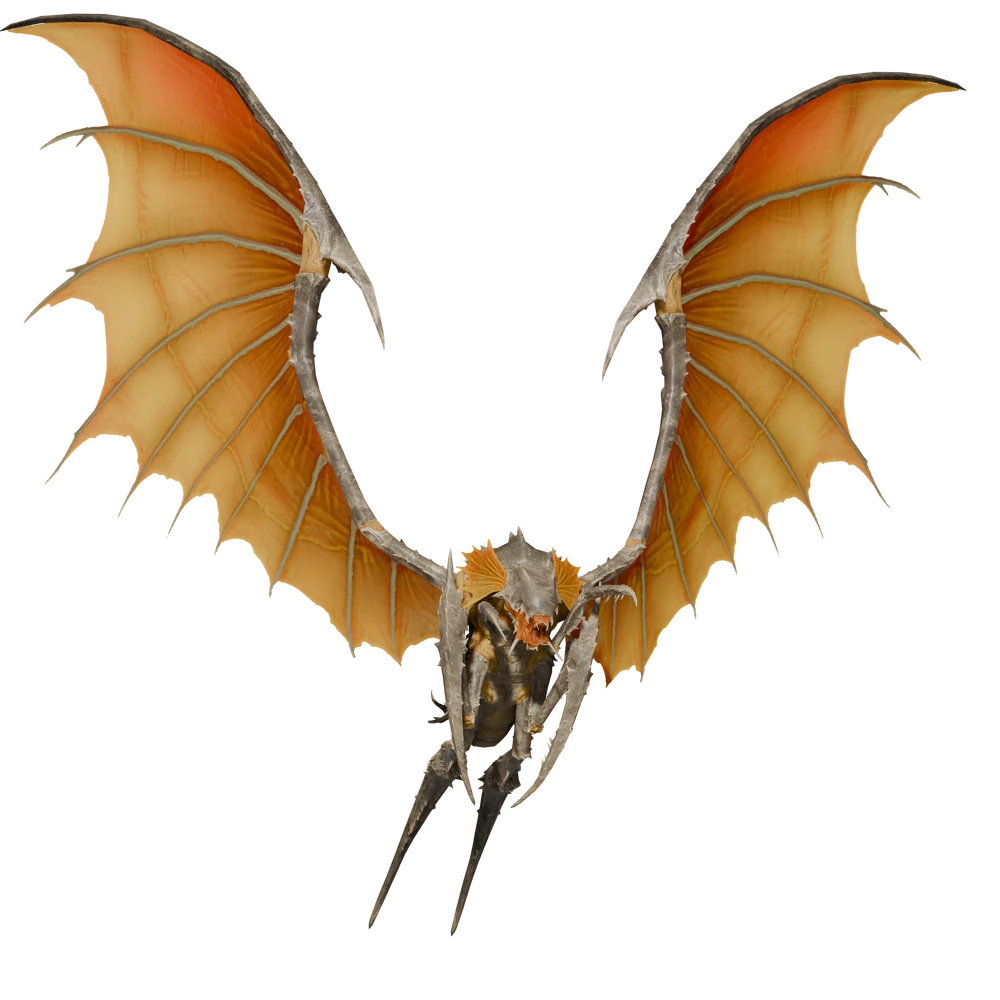
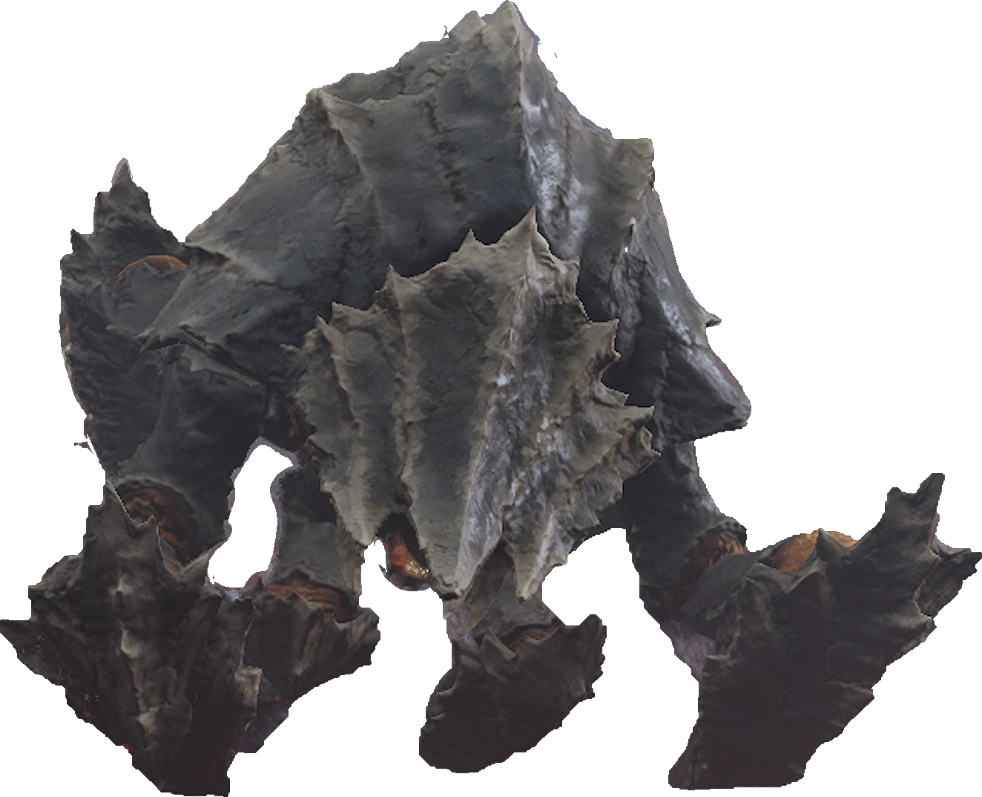
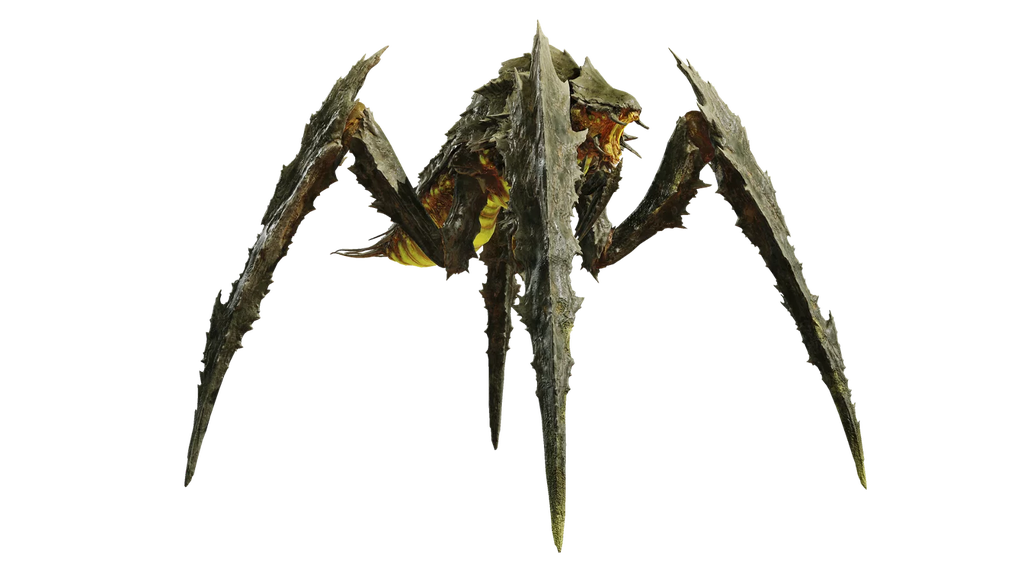
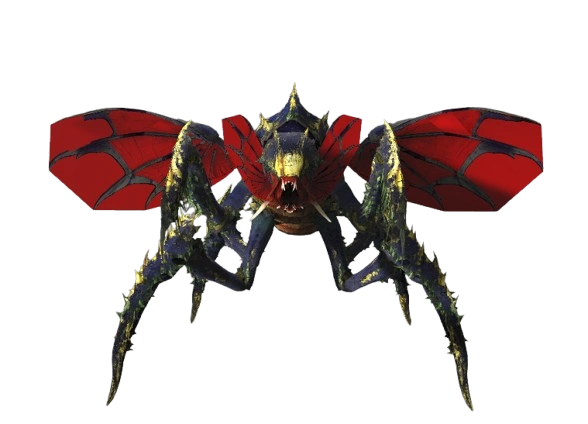
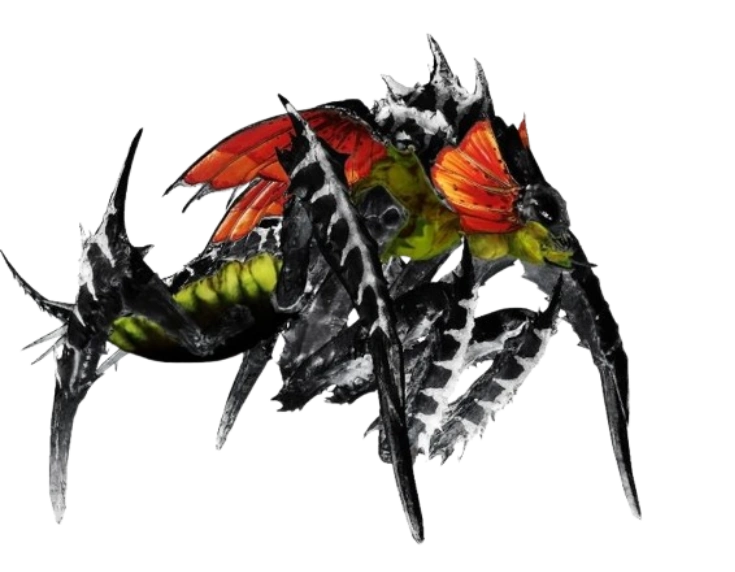
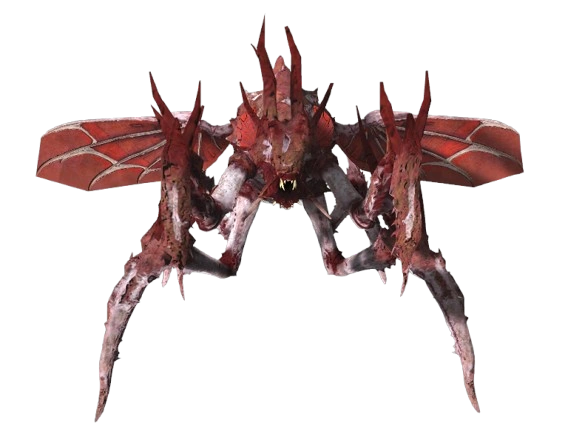
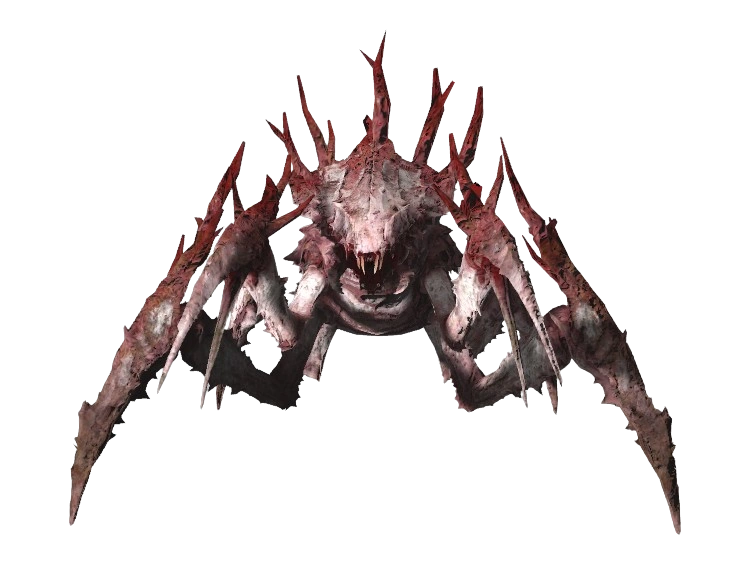
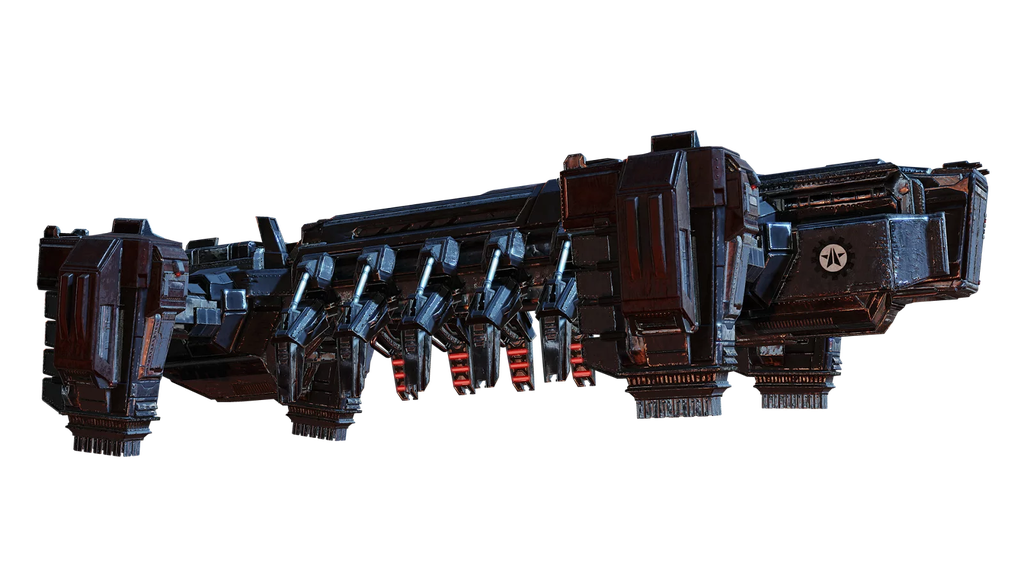
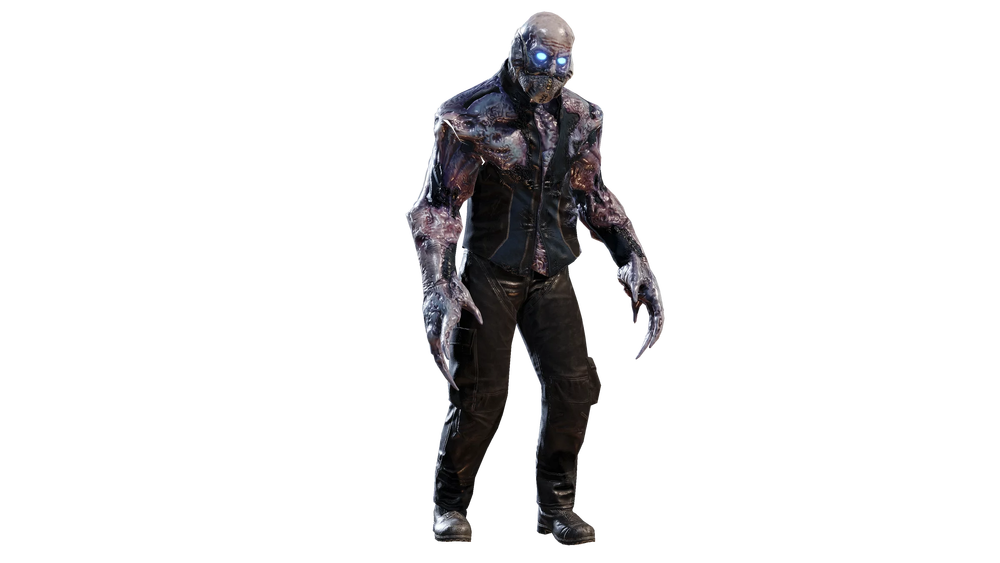
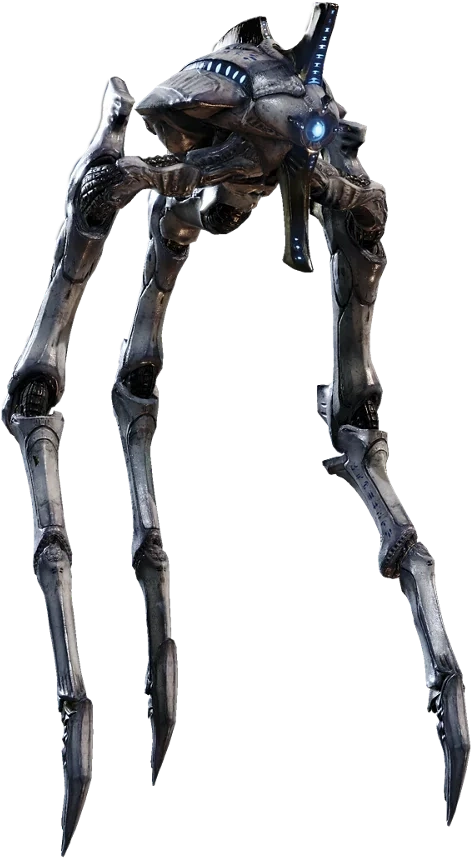
The pouncer will jump to attack, and it only jumps when in relative close proximity. Youcan dodge the jump with a Well-Timed-Dive(tm).

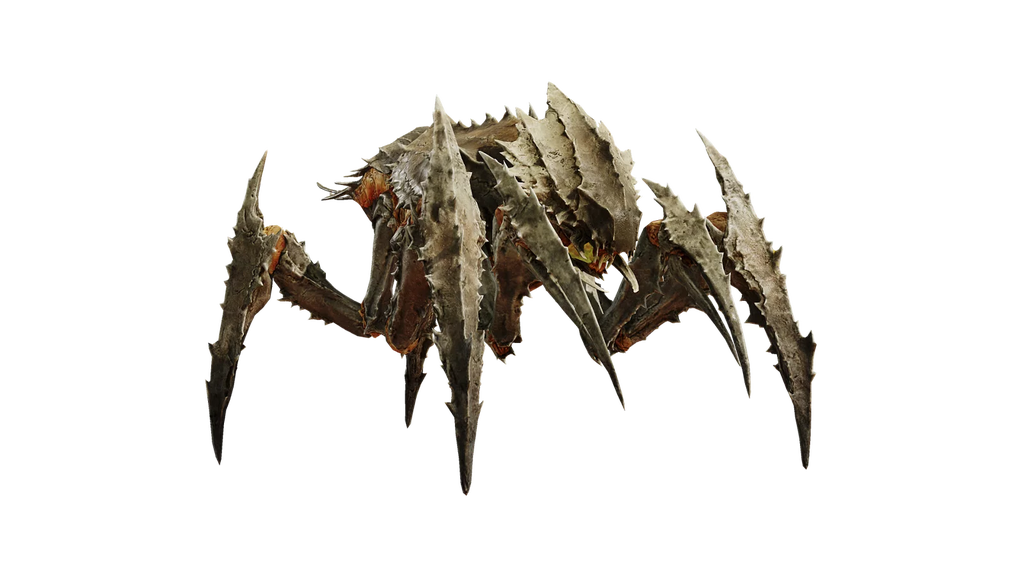
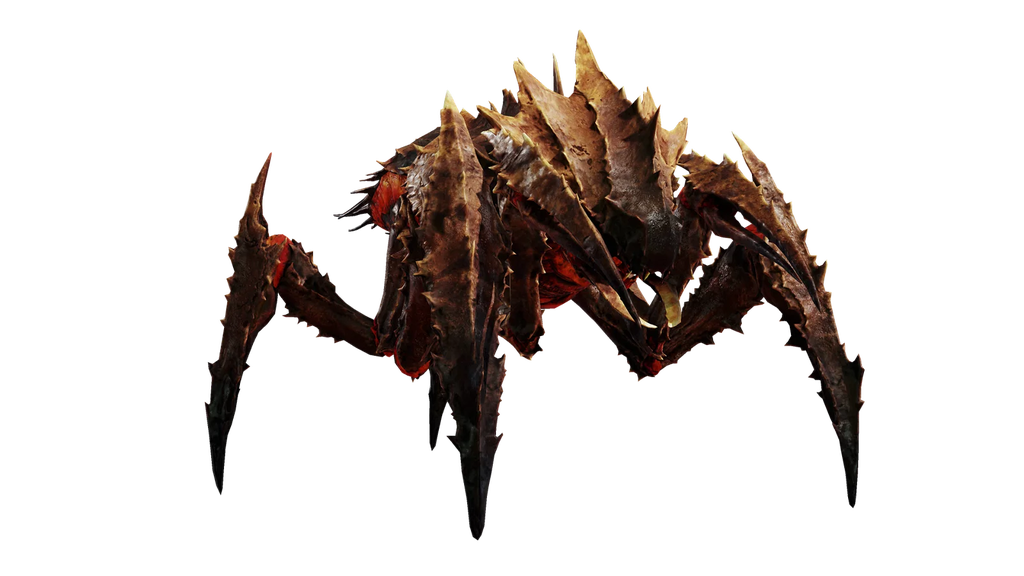
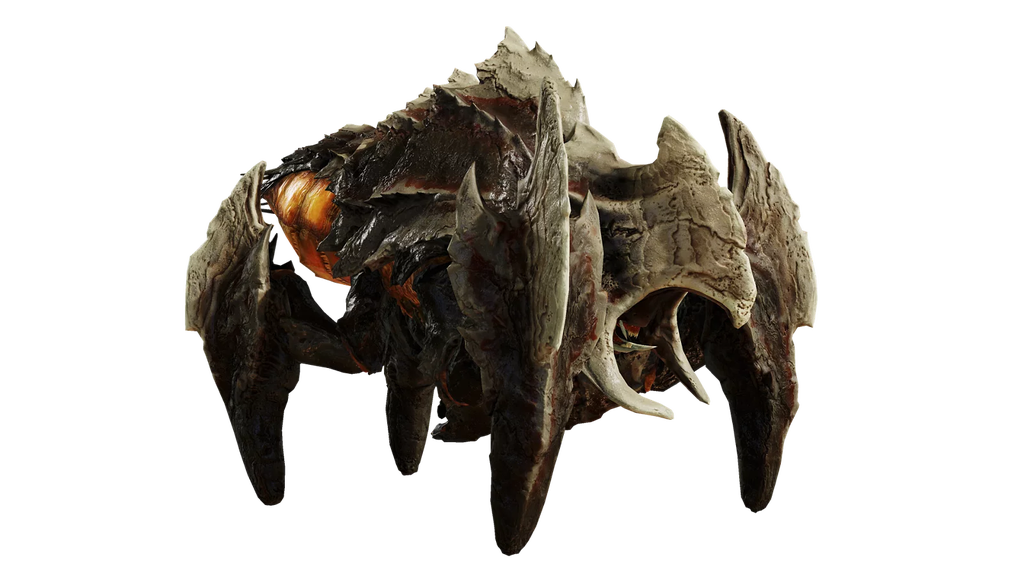
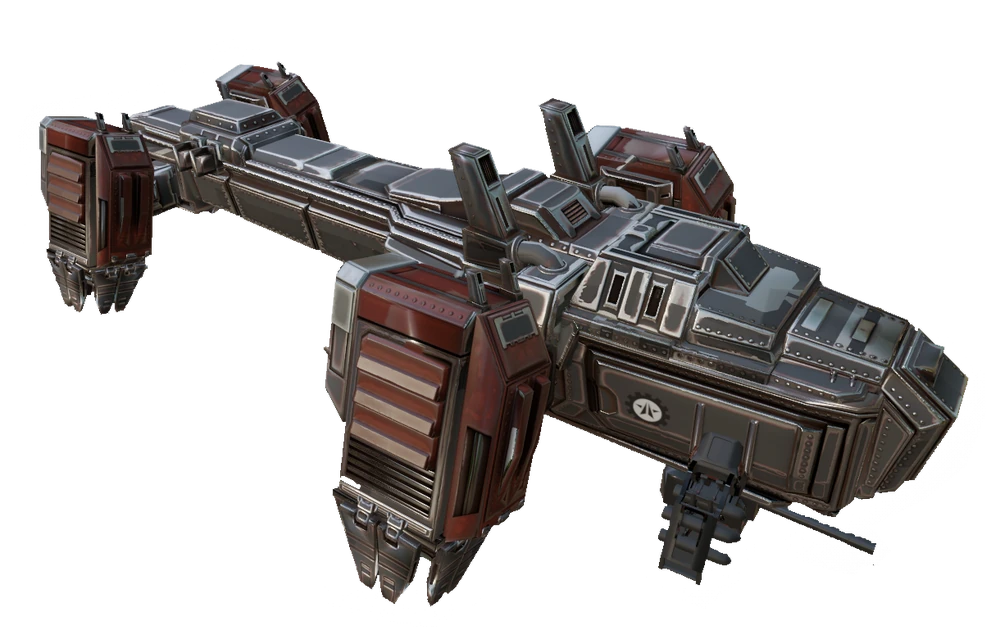
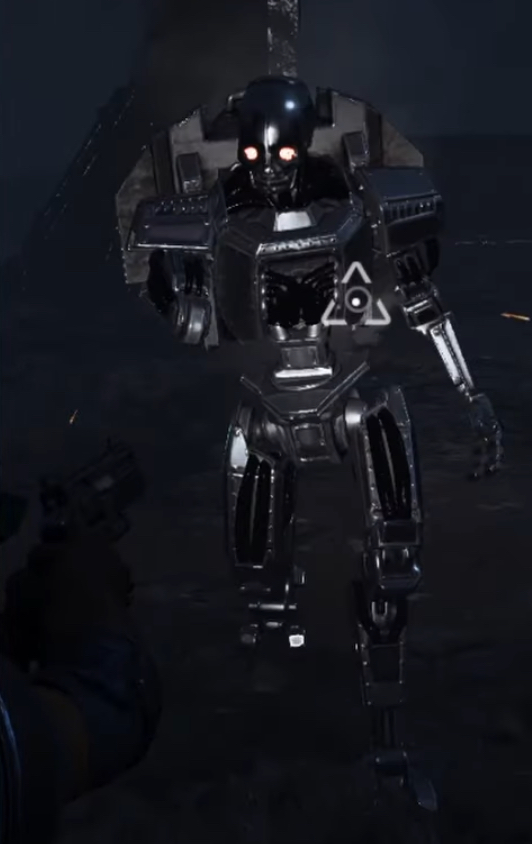
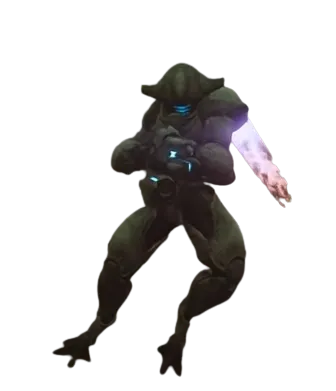
The hunter jumps only to catch up to you, which means it is not a more immediate threat as it will walk the rest of the way towards you. They also jump higher which allows them to escape fire, for example.
MoneyGunsWife Jan 2 @ 4:00am 
For Cannon Turrets a way to avoid them in a pinch is actually to get very close as they will lose sight of you and disengage. You can jump between covers as it fires to avoid being killed
MoneyGunsWife Jan 2 @ 3:58am 
Also you can add that the hulk is one of the bots that has a consederably large explosion upon being killed, which could kill you or ragdoll you if you stand too close after it dies (explosion takes around 1-2 seconds to happen). This also a good way to confirm a long-range kill when in poor visibility conditions like fog (you will see the horizon glow up)
MoneyGunsWife Jan 2 @ 3:56am 
For elevated overseers and automaton foot soldiers you can add a note explaining how you can chuck granades back at the enemy by pressing E